Using Docker Containers for Development

In today’s software development landscape, consistency and replicability are very important. The age-old problem of “it works on my machine” underscores the pain points developers encounter due to varied setups and dependencies. These issues not only impede individual productivity but can also become obstacles in collaborative settings.
Docker, a containerization tool, emerges as a powerful solution to these challenges. By allowing developers to package applications with all their dependencies into a standardized unit for software development, Docker containers transcend OS differences, ensure consistency, and offer portability.
In this post, we see how to set up a development environment, explore the challenges therein, and demonstrate how Docker can be a game-changer, with a practical example involving FastAPI and MongoDB.
The Problems of Setting Up a Development Environment
- Setting up a development environment requires managing various dependencies, libraries, and versions. One project might need one version of a library while another might need a different one. This can lead to the well-known “works on my machine” problem.
- Developers might use different OSs like Windows, macOS, or Linux. Some dependencies behave differently across these systems which can introduce bugs or inconsistencies.
- Setting up an environment from scratch can be time-consuming, especially if there are a lot of dependencies or complex configurations.
- Transferring a development environment from one machine to another is tricky. Even if you document every step, there’s no guarantee the setup will be identical.
- When collaborating on projects, it’s vital that all developers are using the same environment setup to avoid inconsistencies. Coordinating this manually is challenging.
The Docker Solution
Docker offers a way to containerize applications, ensuring they run the same regardless of where the Docker container is running. Here’s how Docker addresses the problems:
- Consistency: Every container has the same set of dependencies.
- Portability: Containers can be easily shared and run on any machine with Docker installed.
- Efficiency: Spin up or tear down environments in seconds.
- Version Control for Environments: Docker images can be versioned, so you can easily roll back to a previous state.
- Shareability: Docker images can be shared on Docker Hub or any container registry, allowing teams to easily collaborate.
Understanding the Docker Ecosystem
How Docker Works
At its core, Docker is a platform that uses containerization to ensure software works consistently across different environments. Unlike traditional virtual machines which emulate entire operating systems, Docker containers virtualize the operating system kernel, making them lightweight and fast.
Each container runs an application as an isolated process in the host operating system. This isolation ensures that each application has its own set of libraries and dependencies, thereby eliminating any conflicts.
Before moving forward, we need to get Docker Desktop and install it to our system according to the instructions.
Dockerfile
A Dockerfile is essentially a script that contains a set of instructions to create a Docker image. Think of a Docker image as a snapshot or template that encapsulates your application and all its dependencies. The Dockerfile specifies the base operating system, installation steps for dependencies, copying source code, setting environment variables, and more. When you run a command like docker build, Docker reads the Dockerfile, executes the instructions, and produces a Docker image as the output. Based on those images you can start running containers.
Docker-Compose
While a Dockerfile is for defining a single container, Docker Compose is a tool for defining and managing multi-container Docker applications. With Docker Compose, you can define services, networks, and volumes in a docker-compose.yml file, and then use the docker-compose command to start all the services as defined in that file. This is especially handy when your application consists of multiple services, such as a web server, a database, and maybe a cache, which all need to interact.
For example, in our FastAPI and MongoDB setup, we used Docker Compose to ensure that both the FastAPI application and the MongoDB server run in tandem, each in its own container, but able to communicate with one another.
In essence, while the Dockerfile is about packaging a single application and its environment, Docker Compose is about orchestrating the interactions of multiple applications running in their respective environments.
Notes
- Volumes are the preferred mechanism for persisting data generated by and used by Docker containers
- Networks Networks are used to provide complete isolation for Docker containers, while allowing the between-container communication.
- Images can require space on the local host machine, make sure you have enough space (about 10G would be ok), before starting.
Setting Up A FastAPI App with MongoDB
The best way to understand the basic concepts, is to set up an example and see the building blocks. Let’s see a basic example of a FastAPI application that interfaces with MongoDB, all using Docker.
First, we write down the requirements:
- We do not have to install anything on our local machine, other than docker itself.
- We will implement two separated entities:
- The python environment where our web app will be running
- The MongoDB environment where the data will be stored
- Our source code needs to be directly accessible from the first container so that the updates are being captured
- MongoDB data should be stored on a local volume to ensure data persistence. This way, even if the container is rebuilt or restarted, the data remains intact.
Since we will dockerize our entire application, the first requirement is satisfied.
Our project structure is:
/shoppingList
|-- app
|   |-- main.py
|-- docker-compose.yaml
|-- Dockerfile
Creating the FastAPI Image
For the FastAPI Image, we will create a Dockerfile that starts from a pure Python image and installs all the required dependencies. The initial base image, if it is not available on our system, it will be retrieved from the Docker Hub.
Dockerfile:
FROM python:3.10

WORKDIR /app

RUN pip install fastapi[all] pymongo uvicorn

EXPOSE 8000

CMD ["uvicorn", "main:app", "--host", "0.0.0.0", "--port", "8000"]
- The first line tells docker to build an image based on
python:3.10. The number after the colon is the image tag, and here it matches the python version that wil be available to us. - The second line defines what will be the working directory of the image and the respective container.
- The third line runs a command when building the image, which installs our application dependencies. The resulting image will contain also those dependencies installed.
- The fourth line tells us that the container will expose port 8000.
- The last line is the command to be executed when the container starts:
uvicorn main:app --host 0.0.0.0 --port 8000- This command will be executed in the working directory
/app.
We immediately see there is something missing here. There is no application in the /app folder, so the last command will fail. To solve this issue, we first need to implement the source code of the app.
Creating the FastAPI Application
First, let’s create a basic FastAPI app with a simple response, just to make sure it works. Next, we will implement our application logic. The content of our app/main.py file looks like:
from fastapi import FastAPI

app = FastAPI()

@app.get("/")
async def list_items():
    return {"title": "Shopping List App"}
Note that we do not have the fastapi installed on our local machine, but in the container. In order to provide access to our code, we can either copy the folder into the image, or create a volume that maps our local folder into the folder inside the container.
Copying the file into the image
If we want to copy our source code into the image, we need to use the COPY command in the Docekrfile:
FROM python:3.10

WORKDIR /app

COPY ./app /app

RUN pip install fastapi[all] pymongo uvicorn

EXPOSE 8000

CMD ["uvicorn", "main:app", "--host", "0.0.0.0", "--port", "8000"]
This, will work and is a good practice when we want to deploy in production. But if we want to develop the application, after each change we need to re-build the image.
Using volume
Alternatively, during the development, we can map the local folder directly into the container. To do this, we will start the container with specific command line argument. First, let’s build the image (this might take some time) with the command docker build -t fastapi . (dot included). The -t fastapi part is to name the image so that we can use it later.
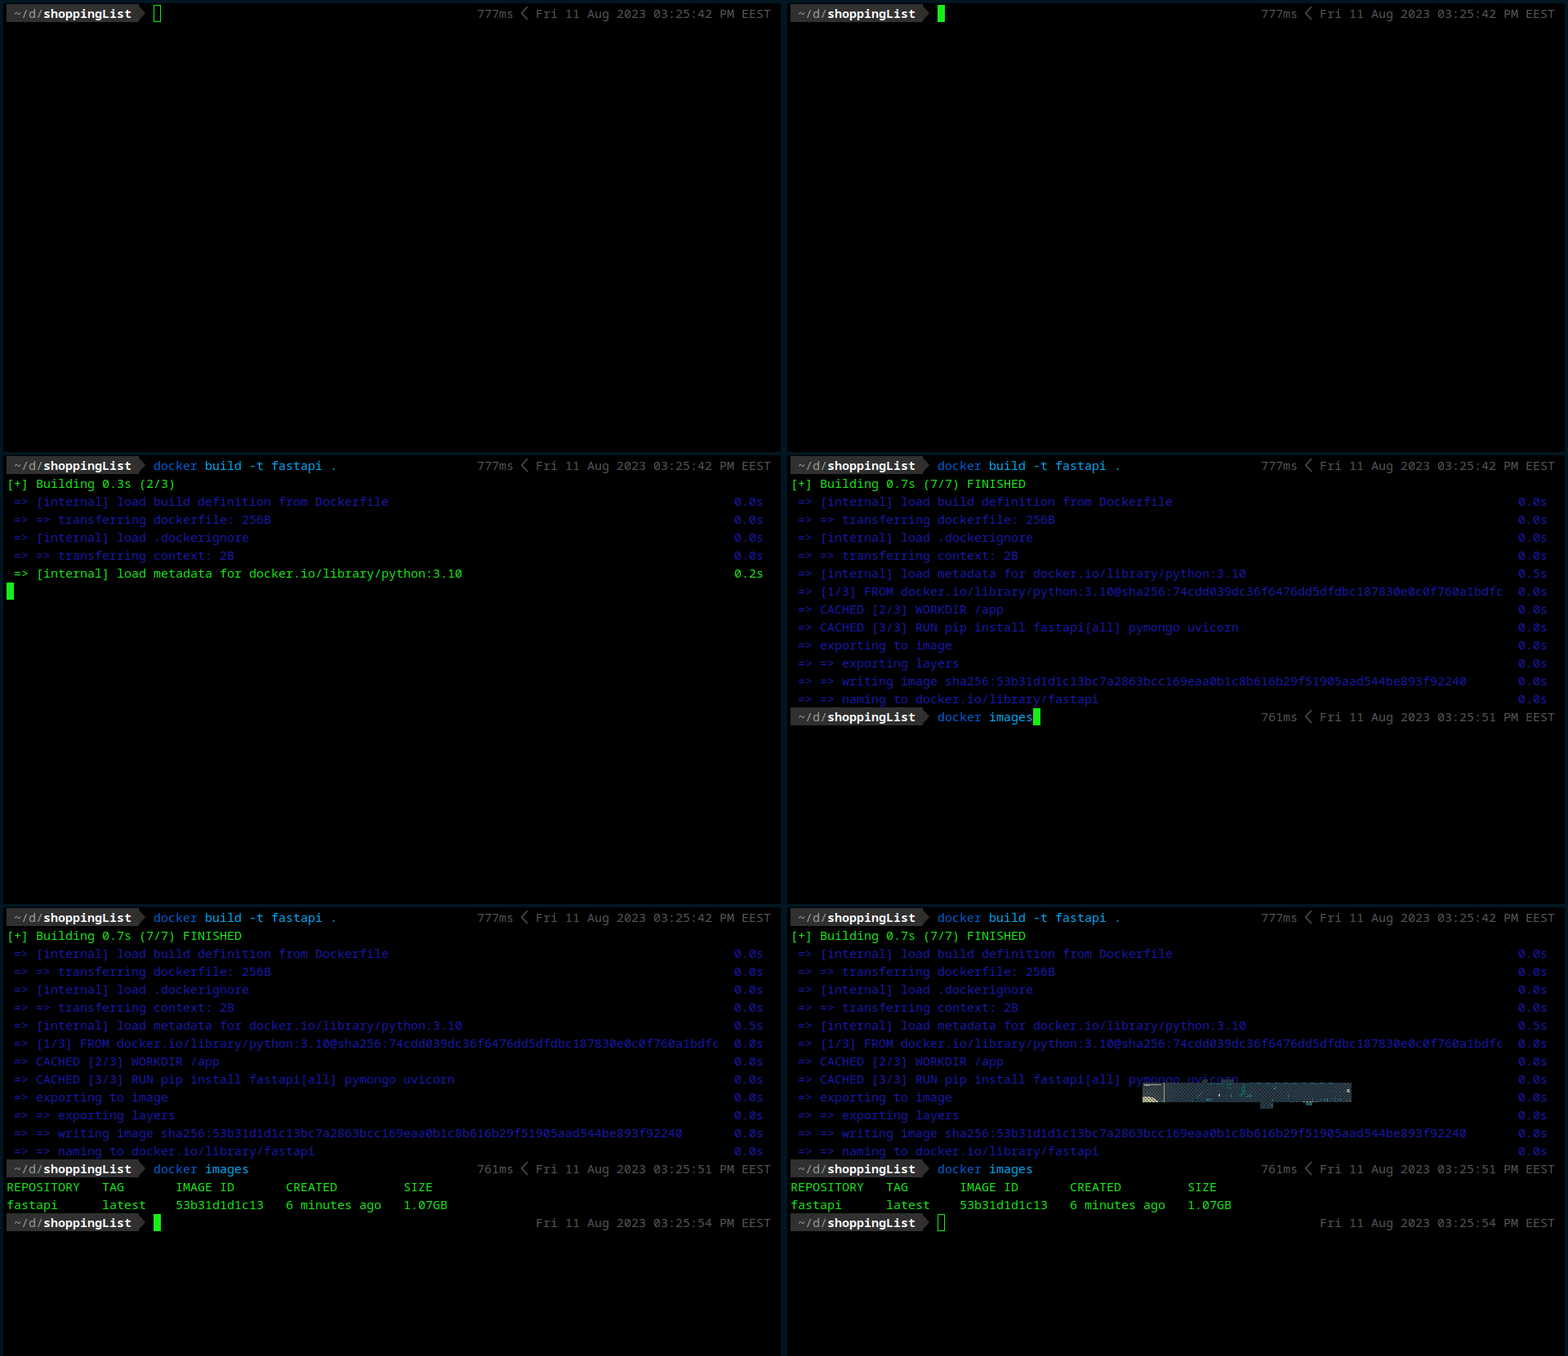
Now that the image is ready, we can use it to run our first container. We use the command: docker run --rm -d -v ./app:/app -p 8000:8000 --name fastapi-app fastapi. Here the parameters are as follows:
-
--rm: Remove the container once stopped. -
-d: Run in detached mode. -
-v ./app:/app: Create a volume that binds the./appfolder in the current directory, to the/appfolder inside the container. -
-p 8000:8000: bind the port 8000 of the host (localhost) to the port 8000 of the container. -
--name fastapi-app: Give a name to the container. -
fastapi: The name of the image, the container will be created from.
Once we crate the container, we can check the output using docker logs <container name>. We can also use the curl command, or a browser, to visit the localhost:8000 and verify if the app is running.
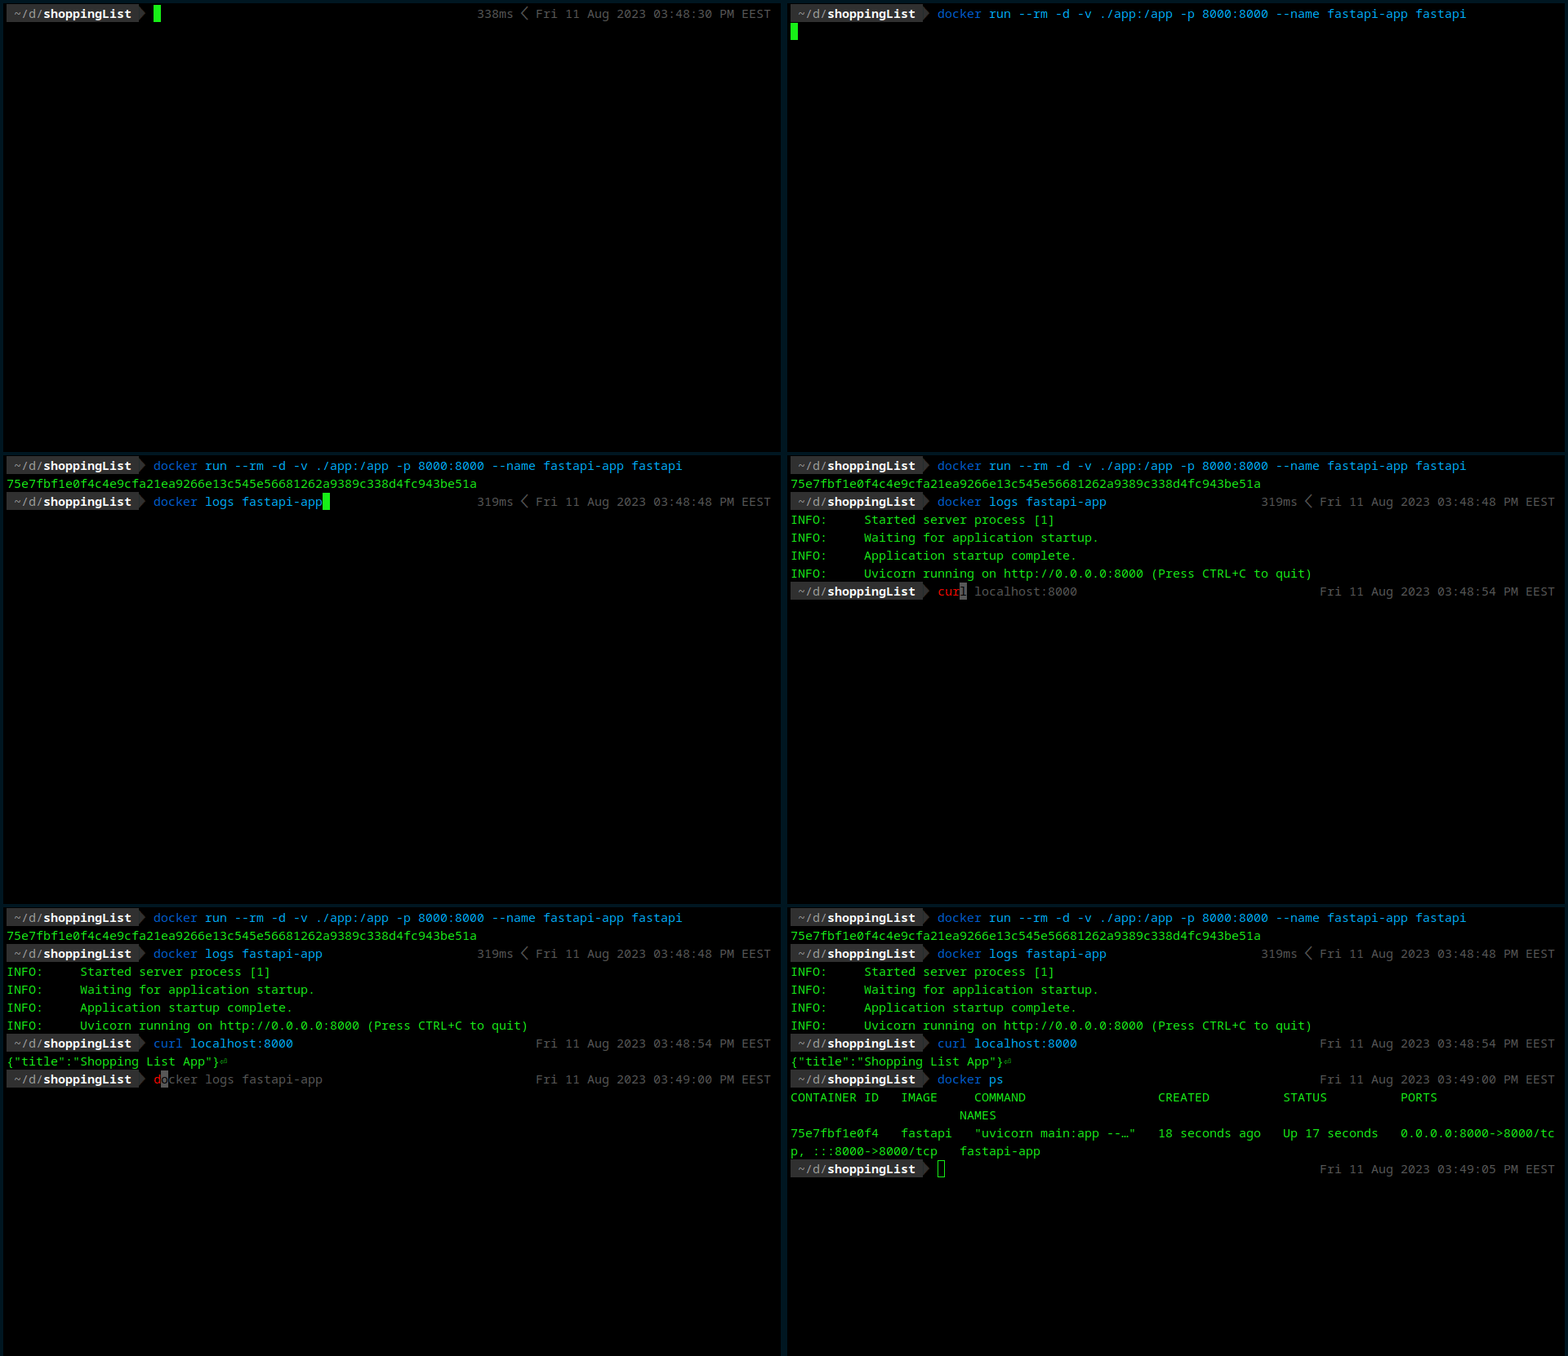
With docker ps we can see a list of running containers.
Building a Network
Before starting the MongoDB container, we need to assure that the two containers can communicate with each other. To achieve that, we create a network: docker network create shopping-list. Now that we have the network named shopping-list, we will stop the fastapi-app container, and start a new one that will be part of this network:
- Stopping the container:
docker container stop fastapi-app - Starting with the network argument:
docker run --rm -d -v ./app:/app -p 8000:8000 --network shopping-list --name fastapi-app fastapi
Running the MongoDB Container
Regarding MongoDB, we will not need to apply any customizations and dependency installation. Hence, we do not need to create a new image. We can use the available MongoDB Image and run a container directly from there, without the need of a Dockerfile. We will need to define some environment variables though, to define the database access credentials. Finally, since we know that the data are being stored in the /data/db folder, we can crate a named volume which will remain intact even if the container is deleted. We do not need to define the host folder, as long as we know that docker will make sure the volume will not be lost.
docker run -d --network shopping-list --name mongo-shopping-list \
                        -e MONGO_INITDB_ROOT_USERNAME=fastapi \
                        -e MONGO_INITDB_ROOT_PASSWORD=FastPass \
                        -v shopping-list:/data \
                        mongo
Note that we do not use the --rm option, since we do not want the container to be deleted when stopped. Now, from the fastapi-app container we can access the mongo-shopping-list container by using the containers name.
Putting it all together
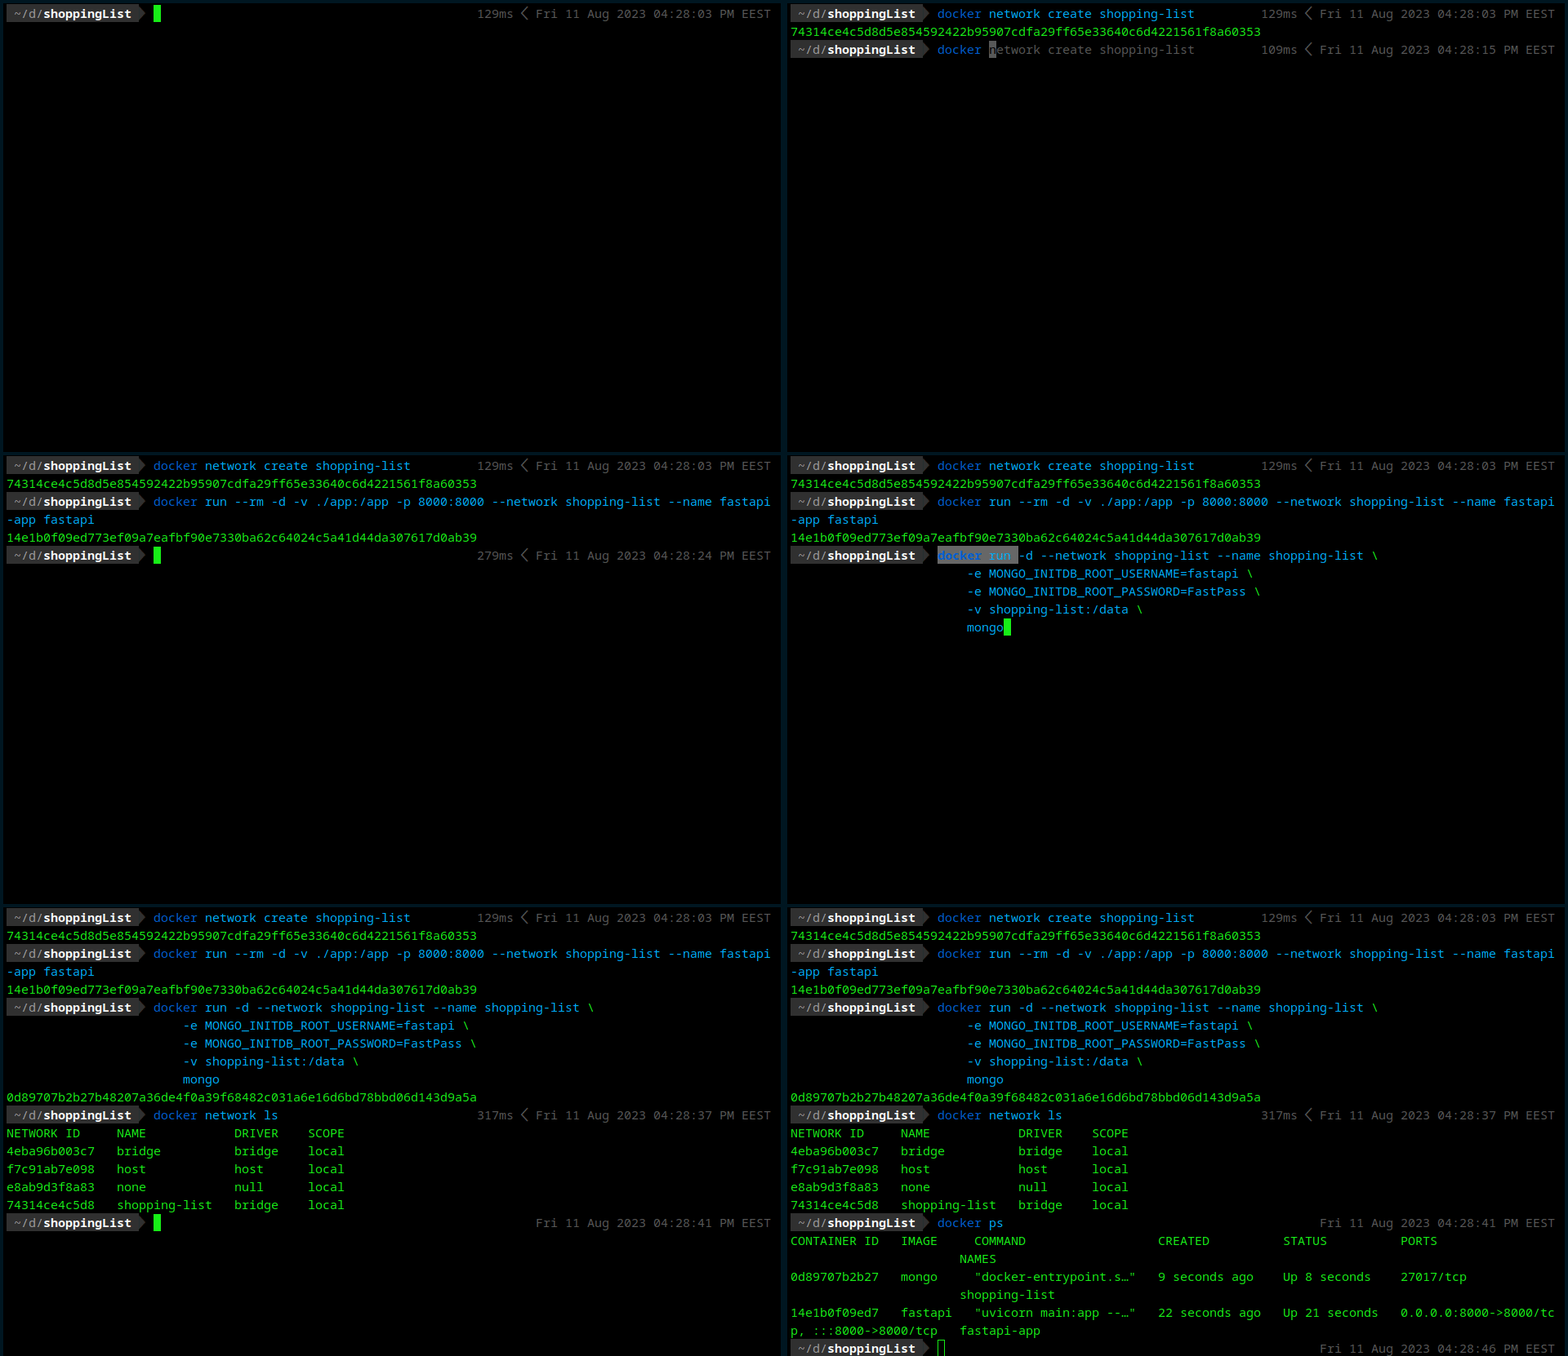
Completing the API
In order to check if it all works correctly, we will complete the code so that our API is ready to save, delete and load the shopping list items. We will do it using the following code:
from fastapi import FastAPI
from pymongo import MongoClient
from pydantic import BaseModel

app = FastAPI()

client = MongoClient("mongodb://fastapi:fastPass@shopping-list:27017/?authSource=admin")
db = client["shopping"]
collection = db["shopping-list"]

class Item(BaseModel):
    name: str

@app.post("/add")
async def add_item(item: Item):
    collection.insert_one({"name": item.name})
    return {"status": "Item added"}

@app.get("/list")
async def list_items():
    items = list(collection.find({}, {'_id': 0}))  # Don't return _id
    return {"items": items}

@app.post("/remove")
async def add_item(item: Item):
    collection.delete_one({"name": item.name})
    return {"status": "Item remover"}
Without a detailed explanation of the code above, since this post is not about FatAPI, we will check the three end-points and see if we can add/remove/list shopping list items. The important part here is the connection string mongodb://fastapi:fastPass@shopping-list:27017/?authSource=admin. This is of the form: mongodb://<username>:<password>@<host>:<port>/?<parameters> and as you can see, we use the container name (shopping-list) as the <host>.
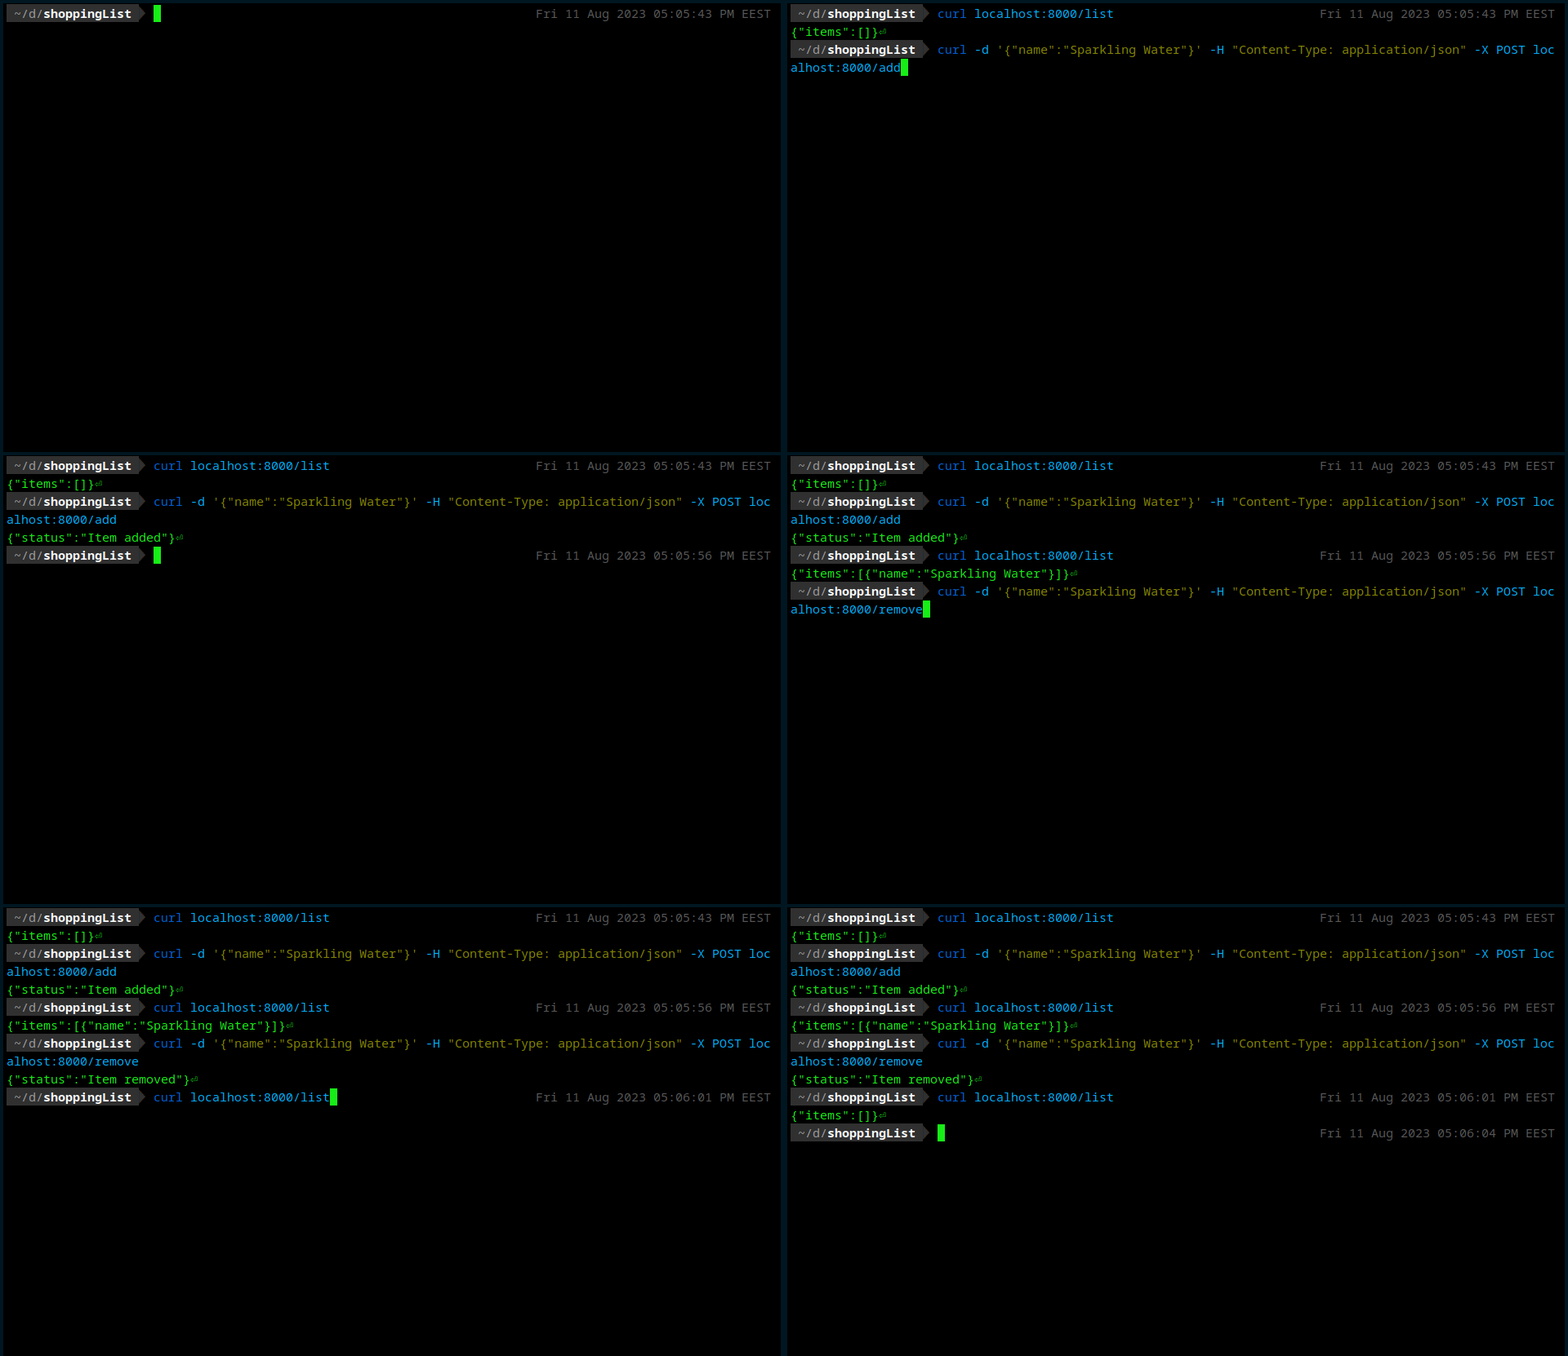
As we can see, the containerized application is running and it can store, list and remove shopping list items. It uses python and the respective modules as well as mongodb, without having any of those installed in our local machine. Regarding the orchestration of the containers, we could use also docker-compose, which will be covered next.
Update: August 14
Docker Compose
A more elegant and organized way to orchestrate containers and their interaction, is using Docker Compose, which is part of docker desktop and no additional installation is required. Docker Compose uses a Compose file, which is a YAML file. For more details, see here.
Let’s see our compose file:
version: '3.8'

services:
  fastapi-app:
    build: .
    ports:
      - "8000:8000"
    depends_on:
      - mongo-shopping-list
    volumes:
      - ./app:/app

  mongo-shopping-list:
    image: "mongo"
    ports:
      - "27017:27017"
    volumes:
      - shopping-list:/data
    environment:
      MONGO_INITDB_ROOT_USERNAME: fastapi
      MONGO_INITDB_ROOT_PASSWORD: FastPass

volumes:
  shopping-list:
Note that by default the services belong to the same network, so we do not ned to define a network here.
In the fast-api service, we specify the following options:
-
build: .: This means it will ook for the Dockerfile and build the image, if needed, from the current directory. -
ports:: This defines an array of port-pairs to be exposed from the container. -
depends_on:: This defines which other services should be started when this service starts. -
volumes:: Here we define a list of volumes.
In the mongo-shopping-list service, we specify the image to be the default mongo instead of building a new from a Dockerfile.
Additionally, we specify the environment variables, in order to define the mongodb user credentials.
Note: We update the MongoDB connection string to mongodb://fastapi:fastPass@mongo-shopping-list:27017/?authSource=admin.
To use Docker Compose, we use the commands:
-
docker compose up -d: Start the services in detached mode. -
docker compose down: Stop the services (defined in the YAML file).
Let’s see it in action:
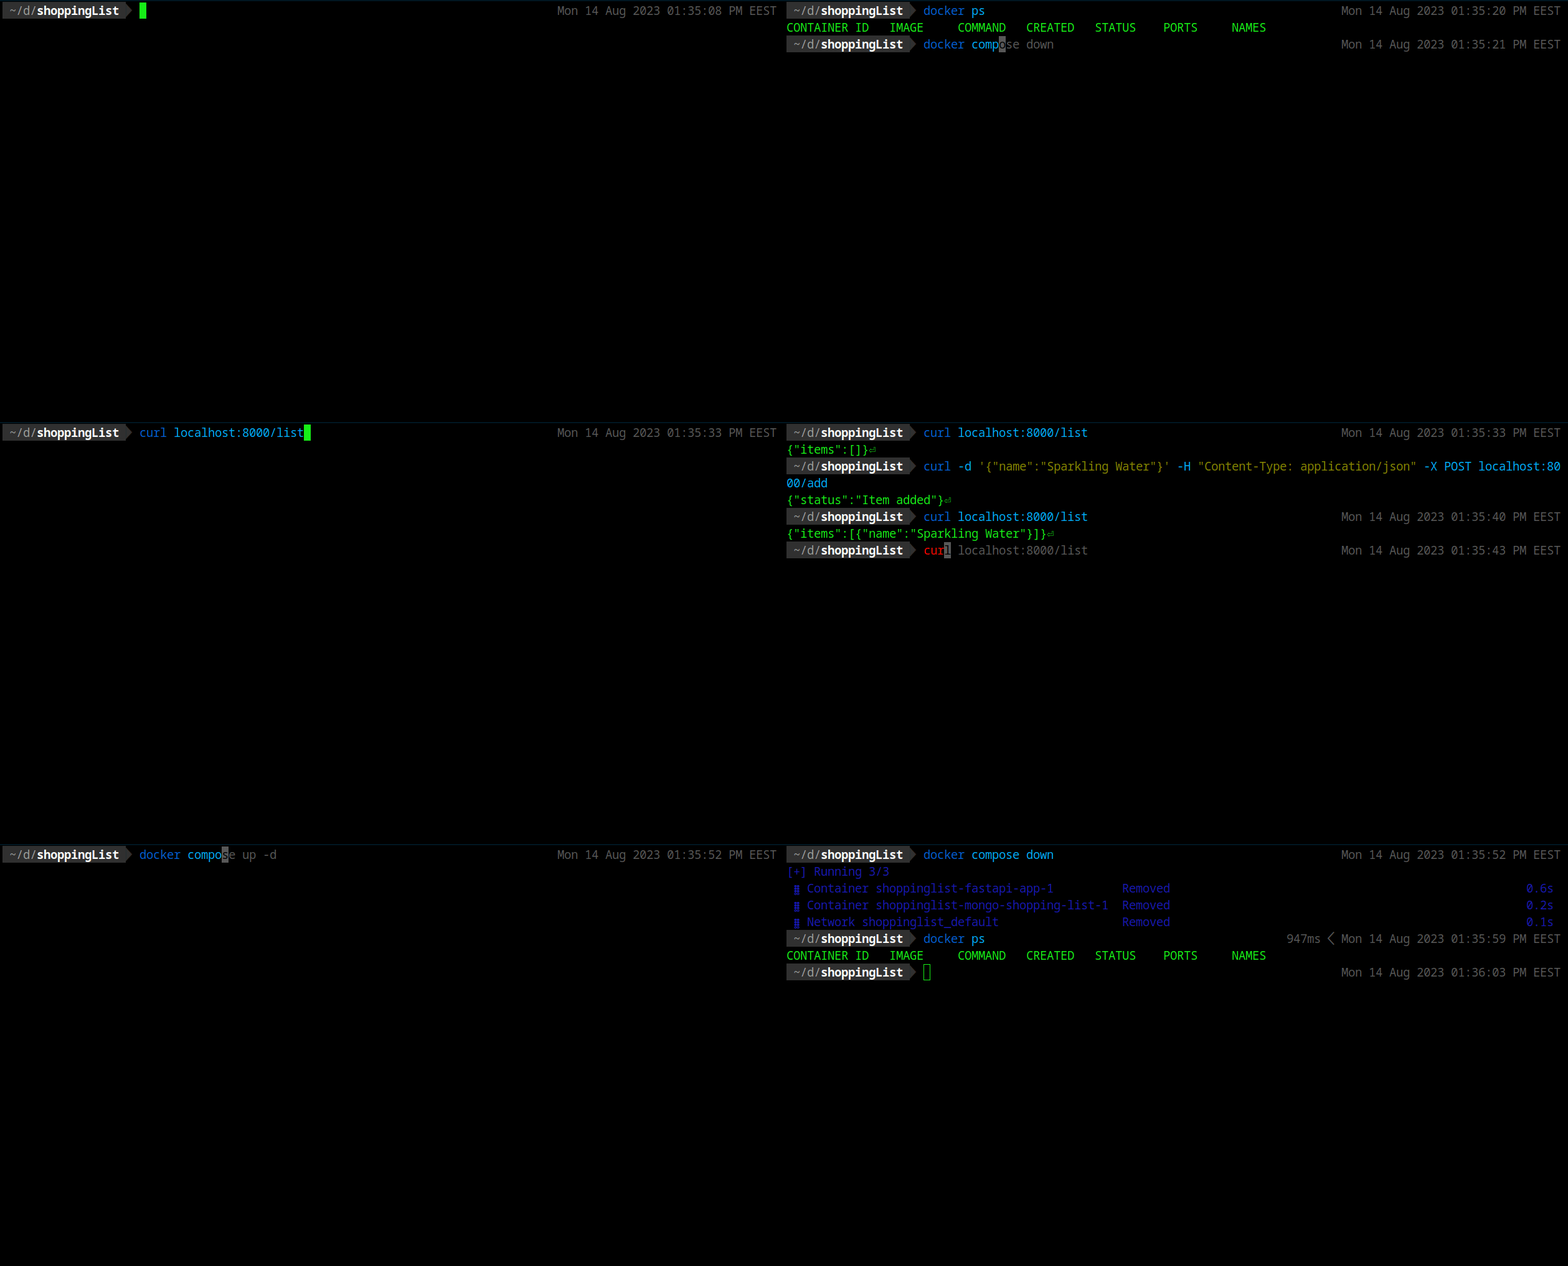
As we can see, it is working as expected. Much easier and faster, using Docker Compose.
